Tuesday

Let's Change the Subject


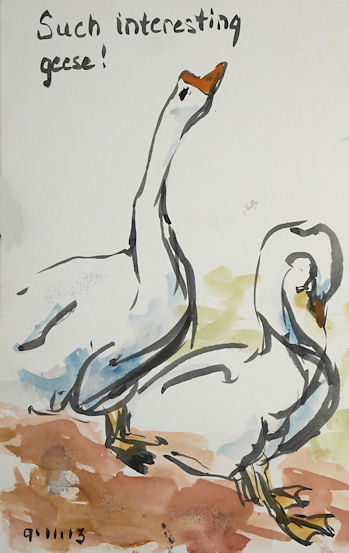
Watercolor in a Stillman & Birn Zeta hardbound book

It's that time of year when change happens. The days are getting much shorter. They are about to get shorter still when we go off Daylight Savings Time this coming weekend. The weather is getting colder. The leaves are falling off the trees. Most of them are down now, and I expect the rain that comes in a couple of days will remove most of what's left. Winter won't be far behind.

As a painter, this combination of events has many repercussions. I'm touching up plein air pieces that have been done over the past three seasons and not yet quite finished, picking out the bugs and blades of grass and bits of sand and dirt, and getting them ready for holiday sales. I'm varnishing and framing a lot of paintings (just varnished 21 pieces a few days ago), and getting them to the galleries for the holiday shows. I'm preparing for The Big Move into the studio for the winter.

I actually look forward to this annual change. It gives me a chance to dive into other subject matter that I love, but don't have time for during the seasons of better weather. I have an opportunity to listen to great music while I work in the studio, tackle some larger pieces, and do my commission work. I can get back to open studio figure drawing and painting, portraiture, and mix it up with a bit of still life. I experiment with materials, new color combinations, and explore style.

I anticipate it won't be long before our plein air group starts our regular winter portrait sketch-a-thons. We gather in somebody's house and take turns doing 20 minute portrait sittings for one another. It's great fun, and we don't have to pay a model! I like to do some sketches from photos as a warmup for the seasonal change. This week I've been focusing on eyes. I'd like to improve my ability to capture expression this year, and a lot of that happens in the eyes. I'm not doing any underdrawing, and just going in directly with a brush and watercolors.


After doing the first few, I got frustrated with my palette, added some colors and swapped out others. I'm finding I need a slightly different selection of pigments for portrait work. Mainly I really missed my cadmium red and cadmium orange. I'm also liking ultramarine violet, and sometimes cobalt violet. I took out the phthalo blue, kept cerulean and ultramarine, and added cobalt.

I'm trying to do a quick portrait sketch after dinner at night, again without any preliminary drawing and just jumping in --- sink or swim. They're a bit fast and rough, but I'm rusty. They'll get better as the season moves along. I'm looking for photos that have good eye images, since that's my focus for now. I went straight in with color on a pre-toned surface again. (The streaky blue and red below are part of that toning process.)


Getting back to my winter fare feels good. I'm looking forward to diving in more as the weather gets colder. I feel inspired by the change. My pet birds, Mango and Coconut, will be happy to have me back in the studio. The dogs' beds are already under my work table. Bring it on!

Sunday

Palette Perceptions


I'm continuing with some palette ideas I started last winter and spring. You can see a couple more of them in this post from May. I'm interested in exploring how our perception of a scene changes with a warm or a cool palette, and the way a limited color range serves to harmonize a painting. This study was done 11x17" across a two page spread in a 8.5x11" Stillman and Birn Epsilon Hardbound sketchbook. I know it's not designed for wet media, but it works great. Their books will open completely flat if you break them in before you start using them, which makes it ideal for working across the spread. I used the new Golden High Flow acrylics, and just a bit of water instead of medium. I'm trying to arrange a setup that's easy to work with in the field at the same time, and hope to test drive that out on location tomorrow. I used six colors for this one. I'm very close to being happy with the selections, but I'm going to make a couple of palette changes today and try again.

Wednesday

Importance of Composition and Color Studies en Plein Air


I don't always do compositional sketches before embarking on a painting. When working out on location, the time to paint is always too short as it is. However, sometimes there are many elements we plan to move around or change. The sketches above are about 4.5x6", done in my Stillman & Birn hardbound sketchbook. The top one is acrylic over a pencil sketch, and the bottom one is watercolor over pencil.

In the top sketch, there was actually no pathway at all going into the field. I felt the scene needed a way to draw the viewer into the composition. I did the sketch in pencil to test drive my ideas. After setting up to paint applying some color over my pencil sketch gave me a chance to try out some color mixes too. When I stepped in to do the actual painting (in acrylic), which was 15x20, I'd resolved many potential problems before I even lifted my brush. This is the finished painting, which will be going up on my Hudson Valley Painter blog soon.


Based on the sketch I'd done, I made further changes when doing the painting. The sketch gave me a chance to consider more options.

The sketch of Croton Gorge Dam was done because the scene was so complex. I wasn't planning to make changes as much as I was trying to wrap my head around what would go where in the confusing mass of shapes, textures and perspective. It took three sketches before I had something I felt I could work with. The first two failures made me extremely grateful that I hadn't just jumped in on my 16x20" painting. Once I did this third sketch of the gorge, waterfall, dam, and bridge, I took out my watercolors and splashed some color on just to get a better idea of what it would look like. I felt I finally had a good working design, and broke out the larger panel for my painting and my acrylics.


This one still needs a few studio tweaks, but I don't think I could have captured this scene effectively if I hadn't taken the time to do the sketches. In this case, the sketches were more complicated and took a lot more time than usual. That proved to me how much I needed to do them, and how far off the mark my painting would have been if I'd neglected that step. It would have ended up as poorly designed as my first sketch of the day (which was so bad that I actually erased it even though it was in my sketchbook!)

The moral of my story to myself is that sometimes it is well worth the time and effort to Sketch Before You Paint. It's the artist's equivalent to Think Before You Speak, and Look Before You Leap!

A Day at the Farm

11x17" (across the spread) in a Stillman & Birn Zeta Sketchbook
Background monoprinted in several layers with a Gelli Printing Plate

My plein air group went to Green Chimneys today, which is a residential facility for children. Their philosophy is that children benefit greatly from caring for and interacting with animals. They have a wonderful farm on the campus. Many of the animals here have been rescued and are in the rehabilitation process, not so unlike the children that reside here.

It was over 90 degrees today, and you'd never know we were into September. Due to the heat and my love of the animals, I decided to spend the few hours there sketching instead of working on a single painting. Of course the animals were in constant motion, so the sketches were gestures, done as they moved about. The sketch above (which you can click on to enlarge it), was actually the last one of the day. It was done across a two page spread of an 8.5x11" Stillman and Birn Zeta hardbound book, which gave me a full 11x17" work area. This is extremely heavyweight paper (180lb) and is fabulous for multi-media work. I've been using a large Gelli Printing Plate to print textured layers of color across the pages. I've done it in both Zeta and Epsilon books. I love having a toned, textured ground to sketch against, especially when working in monochrome. I sketched with a Faber Castell Pitt Calligraphy Pen. I wished I'd brought a bunch of Pitt Brush Pens with me, but alas, I did not.


Above is a two page spread in a smaller Zeta book, without a toned ground. The book is 5.5x8.5", which gives me a letter-size space when working across the spread. When we first arrived at the location, we gathered near a small pond filled with several different types of ducks, geese, and some beautiful swans. They were all highly entertaining! I started out with the little watercolor thumbnail sketch of the pond scene, then did some gesture sketches of the geese and swans, using the same Walnut Brown Calligraphy Pen, and a little watercolor.


I got tired of the brown and wanted to work with a brush, so for the sketch above, I pulled out a Pentel Aquash Grey (or maybe Light Black?) brush pen, plus my Kuretake brush pen, which was filled with Platinum Carbon Black ink. I added orange gouache for the beaks and cerulean blue watercolor for the shadows. I liked these two gestures. The goose on the left kept ducking his head down into the water to drink, then would raise it way up. Every time he stretched his neck and head up, I put in a few more lines!


11x17" across the spread, Stillman & Birn Zeta Hardbound book
Golden Fluid Acrylics background, printed with a Gelli Plate
Sketch done with Golden High Flow Acrylics

My friend Bea called me over to the other side of the pond to witness some swan antics. One kept swimming back and forth in front of me. I found this page that I'd printed using paper doilies on the printing plate to keep some clear areas, and decided to put the swans there. I worked on several views at once, changing from one to the other as he changed direction, swimming around in a circle. I mixed a violet out of some of the new Golden High Flow Acrylics, using Ultramarine Blue and Quinacridone Red, and did the sketches directly with a watercolor brush. The orange is Pyrrole Orange, a color I am becoming quite addicted to!


Saturday

Just Splashing Around


Every once in awhile, we need to just throw paint. That's what I was in the mood for when I did these two acrylic sketches! They were done from life, from potted plants in my studio. I let the paint spatter and drip, painted into it, made some drips, and just kept doing that until I had enough! This two page spread is about 14x10" in my homemade blue Pescia journal. It was painted with the same Golden Airbrush paints described in my previous post, as well as some Golden Fluid Acrylics for a bit more body to the paint.

I still have two blank pages to fill in this journal. I think my "Kinda Blue" theme played itself out. I was ready to be cheerful by the time I got to the paint-slinging phase here! I will definitely finish it up though as soon as the desire to sketch on something blue surfaces.

Thank you for following along through this journal. This week I'll be posting my review of the new Golden High Flow acrylics.

Friday

Birthday Flowers on Blue Pescia Paper

10x8", Noodlers Luxury Blue ink in  my Pescia light blue journal

A good friend sent me flowers for my birthday during the time I was working my way through this journal. In sticking with my "Kinda Blue" theme, I did a blue-on-blue sketch of some of the flowers, using Noodlers Luxury Blue ink in a Lamy Safari fountain pen. When I was finished, I took a fairly stiff brush to the flowers to brush out some shading color from the lines. This ink is fairly waterproof, but you can get a little color to move on it, which I find useful, especially when working in monochrome. I was continually impressed by how well this printmaking paper handled assorted media. In spite of little sizing, the ink did not bleed nor feather, and painted pages dried flat. Now that I've gotten into monoprinting, I've been doing some prints on it too. Great stuff! I didn't think I'd like blue paper as much as a warmer color, but it surprised me.

Thursday

Three Page Hudson River Vista


This is a 10x22" spread across three pages in my blue Pescia journal. You can click on it to enlarge the image. (Here is a link to how I made this fabulous 16-page journal from a single sheet, in case you missed it.) It's a scene from Dennings Point Park facing downriver through the Hudson Highlands, with Bannerman Island showing on the right side, just in front of the mountains. I had been wanting to paint this for so long, and will probably do a larger version to frame and hang in the near future.

This painting was done with traditional brushes, but I used the Golden Airbrush paints to do it. That line of acrylic paints has been reformulated, and has just hit the market as the new Golden High Flow line. I ordered some as soon as they became available, and was delighted to see the color range expanded to include some colors that I sorely missed in the Airbrush line. I have the new paints here now, and will be posting a review of them next week.

Wednesday

Silverpoint in a Sketchbook


One of the things I experimented with in this blue Pescia book was silverpoint. Doesn't silverpoint have to be done on a hard surface with extensive preparation? Not anymore! Golden makes a Silverpoint Ground that I decided to test drive. I taped the edges of the page and gave it a couple of coats of the Silverpoint Ground. My daughter posed for me, and I sketched this in 20 minutes or so, using a silver stylus. I was really surprised by how well this technique worked out in a sketchbook! The page is 8x10", and the silverpoint sketch portion is about 8x6.5".

One of the problems with silverpoint is that there is no going back. You go right in with the silver stylus, and there is no pre-drawing nor erasing. What you put down stays there, mistakes and all. Initially, the drawing looks very light, like this one. However, over time the silver tarnishes. As it darkens and develops a beautiful patina, the contrast of the drawing increases. I wish there were a way to speed it along! One tip I can give you is that although you cannot erase, you can cover mistakes by painting on more Silverpoint Ground, waiting for it to dry, and then drawing over it. Not that I would do that. Ever. (I can't even type that with a straight face.) But in this case, I did not correct anything and it was sketched start to finish in one short sitting. Here is an image of just the sketch:


Here's a little video that's on the Golden website, which explains more about using Silverpoint Ground:


 Try it. You'll like it!

Monday

A Three Page Spread of Collage


This three page spread is about 10x22". I didn't take photos of the individual pages, but you can click the image to get a much wider, clearer view of it. It was done around Valentine's Day, hence the hearts on the left. Those started out as red paper heart doilies. I cut out parts of them, painted them with blue acyrlic, and decorated with a gold leafing pen. The paper snowflake on the right was cut out from blue patterned origami paper, which I then added to with gold paint. It was a memory of Sandy Hook and all the paper snowflakes that I made to send there. In the center of the three page spread is a poem about snowflakes by Henry Wadsworth Longfellow. I copied it over and then painted over it with some glittery Mod Podge stuff, just to see what it would look like since I'd never used it. I kind of like it! I'm thinking I might paint over the cover of this sketchbook with it, since it's a polymer that would also protect the book.

This is the blue Pescia, 16-page journal that I discussed in yesterday's post.

Sunday

Kinda Blue


The sketch above is Posie, my studio assistant, rendered directly with blue Big Brush Pitt Pens by Faber-Castell on heavy Pescia 100% rag paper in a delicious light blue color. Actual size is10x6". I'd always wanted an anatomical model from which to practice drawing in the winter when I don't have a model around. Posie has filled that role nicely. The full size artist anatomy models are hundreds of dollars, so when I saw five foot Posie in a Costco display around Halloween for $38, I brought her home with me.

In the cold, dark and dismal days of February, I made a separate sketchbook out of the blue Pescia paper to work out my winter frustrations for a couple of weeks, and I titled it Kinda Blue. This is one of my favorite drawing and printmaking papers, but during the course of completing this sketchbook with experimental this-and-that, I learned to love it for many other things too.


The sketchbook is 10x8", opens flat, has 16 pages give or take, and some fold-out three page spreads. It is made using a single sheet of standard 22x30" paper. I love making these books because I get a full little sketchbook out of one sheet, with no waste left over, which always makes me feel like I got a bargain! I generally use bookbinding thread, but in this case I couldn't find my thread and I used dental floss. It worked just fine. I learned how to make these books last year by watching Teesha Moore's outstanding video:

I did a few pages of pen and ink, covered a page with Golden Silverpoint Ground and did a silverpoint sketch of my daughter, made a three page spread of collage, and did a few acrylic paintings in it. I'll get those posted over the next several days, and hope to do a video flip-through too at some point. (I keep saying that but somehow never get through the learning curve to make it happen!)

These little books could never replace my hardbound sketchbooks; they are more like "special project" booklets. They come in handy for traveling when you can't lug a heavy sketchbook, and want a separate memory of a short trip, or if you have a special sketching project in mind that would be less than 16 pages. The book is very versatile, and you can build in various pockets using the fold-out sections if you have things to store from a trip, such as post cards, photographs, tickets, receipts, and notes. I used a couple of small pieces of the Pescia paper to make color notes and test assorted media. Then I made a pocket with the front flap and used it to store them, so I would have them for reference while I worked through the book. Those note cards came in handy to remember what materials and specific colors I used for the sketches.

Monday

Sketching at Kaaterskill Falls


(Click image for a larger, clearer view.)

A few days ago, I hiked up to the base of Kaaterskill Falls with some friends for an hour or so of sketching. I had previously done a multi-layered monoprint across this two page spread in my Stillman & Birn Zeta hardbound book. The little picture area borders were printed at that time (and later embellished with markers), so I used them to make vignettes of scenes at the falls. The first one, on the upper left, is the grand view of Kaaterskill Falls, which is the tallest waterfall in New York State, and appears in many Hudson River School paintings. The little round sketch to its right is a rock study. Rocks give me a wonderful way to examine how value and color change as the form turns toward and away from the light. The third little sketch (the oval) is my friend Athena, who was sitting next to me painting the falls in watercolor. The last tiny sketch is unfinished, because everybody was packing up to go at that point. I tossed all my stuff into my backpack and we hit the trail! These were all done in gouache over the acrylic background.

Sunday

Sketching Boats with a Figure 8


I often practice sketching items from photos that I have to be able to pop into plein air paintings quickly. This includes figures, boats, bicycles, cars, trees, rocks, etc. One rainy day, I decided to do some boat sketching. I first searched YouTube for any new tips on sketching boats, and came across this interesting video on how to make boats from a figure 8.


I pulled out my S&B Zeta Hardbound sketchbook and selected this page spread, which I'd monoprinted in several layers across the spread. (You can click here to go to the post where I explained how I did this.)


I started the page spread by experimenting with the figure 8 boats in the video, facing them in different directions. I tried them slightly larger and slightly smaller, varying the sizes and widths of the loops to find what would work best. What I found was that the figure 8 boat sketches are fun and kind of interesting. But it wasn't long before I saw that it only gave me a certain amount of perspective variation and boat angles, and applies to very few cases of actual boats I'd be painting. However, it did give me a feel for roundness and overall shape that I found useful. Once I'd gained what I found to be helpful from the video, I did some larger boat sketches from photos that encompassed other angles and drawing approaches. I'll probably add a few more to this page spread the next time I want to practice sketching boats.

Tuesday

Monoprinting in a Sketchbook Part 2 --- Plein Air Monotypes

11x14" Monotype print across the two page spread
of an 8.5x11" Stillman & Birn Zeta hardbound sketchbook

After spending some time doing the prepared backgrounds in my sketchbook with the Gelli Printing Plate, which I showed in Part I, it was time to explore more painterly monotype prints. After a few rainy days, a gorgeous day finally arrived, and I was too exhausted to head out to paint on location somewhere. I wanted to stay home. I brought all my gear out to the patio for an afternoon of plein air monoprinting. I was excited about trying this across the two page spread of my sketchbook, like I'd done the backgrounds. As you can see, it worked out fabulously well and printed right up to the gutter on both sides. As I stated in Part I of this monoprinting series, it would be ever so much better if they would make the plate size 11x17, rather than 12x14!

I set out a folding table and covered our patio table, and prepared for an afternoon of relaxed image-making. 

One of the tricky things about monotype prints is that when you paint on the plate, you need to create your image in reverse. The image will flip when you press your print. (This is especially important if you are creating text!) This was all so new to me, and I had a hard enough time wrapping my head around the whole technique of getting the paint onto the plate in a way that would transfer well. I decided not to worry about the reverse images for now, and allowed my landscape to reverse itself when I pressed the prints.

For these monotypes where I painted with brushes on the plate, I used Golden Open Acrylics. I had tried it the day before with the traditional Fluid acrylics and found that even though the fluids worked well for me when doing the textured backgrounds, they didn't give me enough working time for painting with brushes. Monotype printing is a somewhat subtractive process, so you need to not only be able to put paint down, but also to lift it off to reveal the white of the paper when the print is made. You need to think like a watercolor painter in getting lights down and working transparently, and like an oil painter in layering and removing color. It certainly keeps you thinking!


Later in the day, I moved over to the other side of the patio so I could take advantage of the view off the other side. I didn't like this one as much as the other, but I learned a tremendous amount from both of them, and look forward to further exploration of the monotype process. Generally speaking, it would be hard to do this plein air when traveling to locations, but definitely not impossible if you use a smaller Gelli plate and work in a smaller size. (You can see the wheels in my brain turning, can't you?)

Are you intrigued? Well, then definitely give these Gelli Printing Plates a try! They're inexpensive and a lot of fun. They give interesting effects and force you to think outside of the box --- always a good thing! If you have Stillman & Birn sketchbooks, you can take full advantage of their ability to open flat so you can print across the spread. Creating a sketchbook of monoprints is an exciting endeavor!

Monday

Monoprinting in a Sketchbook Part I

There's been a lot of buzz out there lately about the new Gelli Printing Plates, which enable artists to use traditional acrylics to create monoprints inexpensively, and without a press. I had to get on board that train! I ordered the largest size available, which is 12x14". As soon as it arrived, I dove in. My goals were to create textured backgrounds for artwork using monoprinting techniques, as well as traditional painting on the plate to directly monoprint a work of art.

I spent a couple of days creating all sorts of effects and exploring techniques. I used brayers, squeegees, textured surfaces of all kinds, stiff and soft paintbrushes, fingers, paper towels, Q tips, color shapers, put on paint and pulled out paint. I worked multiple layers on many different types of papers, and well as single-layer, brush-painted monoprints on good printing paper. I used fluid acrylics, Golden Open acrylics, and assorted mediums. I tried some interference paints, iridescent paints, and sprayers. Here are some of my more interesting results. (Believe me, with all that experimentation, there was a lot that wasn't worth sharing!)

I've always loved sketching on a prepared ground. I often pre-toned my sketchbook pages, or layered on textures using assorted tools. I've seen many YouTube videos where artists monoprinted the full sheets of paper, then  made sketchbooks out of it to get the prepared grounds. Other videos and blog posts showed printing in a hardbound book, using one side of a page at a time. The problem with either of those methods is that the left and right sides are from different prints, so they don't match. I almost always work across the spread in my hardbound sketchbooks, so that approach was not going to work for me.

Stillman and Birn to the rescue! Because their hardbound sketchbooks are designed to open flat, I thought they might enable me to print right across the spread. I opened up the book and pressed it flat down against the printing plate. And guess what. It works! Furthermore, since I was printing the background and not painting it, I didn't have problems of paint running into the gutter of the book and discoloring other pages.


Above is an 11x17" page spread of an 8.5x11" Stillman and Birn hardbound Zeta book. (It's about four layers of prints.) These new smooth surface books with heavyweight paper are ideal for monoprinting. Who knew! These will be fabulous backgrounds to paint and sketch on now.

The Gelli plate yields a great ghost image too, so it's worthwhile to have paper ready to take the second image. I decided to see if the lighter weight Epsilon books would also print well. I broke one in to be sure the spreads would lie flat enough, and started alternating between the books. That way I could get the most from my colors and textures. Below is the Epsilon spread with the second printings of some of the colors. (I don't know why it's showing sideways, but if you click the image it will right itself and enlarge.)


Below is one of my personal favorites. It was done as two printings --- the first with diluted Cerulean Blue, and then a layer of Transparent Red Oxide mixed with a little Iridescent Copper. It has a very subtle sheen, which is not visible in the digital image.


This one also has iridescent paint, and a few layers:

I'm looking forward to working on these prepared pages soon!

Why the Gelli Printing Plates are made in sizes 6x6", 8x10" and 12x14", I'll probably never know. Paper is sized 8.5x11, 8.5x17, and 11x17, or in the fine art full size sheets of 22x30 (which quarters to 11x15, and 1/8 would be 7.5x11). Therefore, the Gelli Plate sizes do not allow full use of plate nor paper. This is why there are side stripes on some of these page spreads that I printed. I tried to make the best of it. I kind of like them, and I can use them for writing text. For some of the page spreads I printed all the way to one edge, allowing the print to overlap the gutter and leave me with about 3" of unprinted space on the opposite side. Then I could either print that space separately and use it as another graphic block, or I could use it for text to accompany whatever artwork I ended up doing across the spread. I didn't take photos of those yet, so I suppose those will make their debut once the artwork is done over the top of the backgrounds and they become finished pages. However, I wish I had the option of printing across the full two sketchbook pages, and I also wish the plate would accommodate the standard 1/4 sheet size of 11x15 when I use rag paper. The awkward 12x14 plate size misses the mark on both.

Click here to go to Part 2.

Sunday

When Ideas Are Brewing


When ideas are brewing in my head, it often takes awhile for them to emerge as finished paintings. I often play with those ideas in my sketchbook at night, or in a small format on loose pieces of paper. I had some color ideas I wanted to explore last night, so I pulled out my little half-pan watercolor travel setup for these, and used squirrel mop and sable brushes.

I usually keep a few pieces of good rag watercolor paper taped to boards and some are subdivided for sketches like this. Setting up a sheet this way is something I got from a workshop I took with the amazing David Taylor. He always advised doing these small thumbnail sketches on the side of the page in a small taped-off section. That way you can test drive your ideas (a few times if necessary) before taking them to a larger version. It speeds the process along, and you can immediately apply what you learn to the next one. I was torn between working in my sketchbook and working on the rag paper. (I love the way a hardbound sketchbook keeps all my ideas from wandering away!) But in this case, I needed to see how the colors would blend on rag paper. 

Technically, I'm not too pleased with these. However, I am happy with the way the colors are working, and I think with some more practice I'll be able to get what I'm after. Then I'll scale them up and start exploring the idea with assorted materials and techniques. One thing I've had to accept over the past few months is that the way I'm wanting to work with watercolor and acrylic requires a larger palette for those media for wash mixtures. It's always a juggling act to try to determine how much stuff we can take out painting on location, considering the need to pack light and carry it all!

Monday

Courtroom Sketches


I was sitting in on a court case today and had my first-ever opportunity to sketch in a courtroom.  I arrived a few minutes before the first case was called, so I did the quick sketch above to feel out the lay of the land and get my bearings. I used a Pentel Gray Aquash brush pen for all of my sketching today. The sketchbook is one of the new Zeta hardbound books from Stillman & Birn. Going right in with an ink-filled brush is really my favorite way to go about this kind of thing, especially on this smooth Zeta surface. The two facing pages of this spread had been slightly toned with a warm-colored watercolor wash several days previously. I laid in a bit of color after I got back home just to liven it up a little.

This was the Albany City Court building. I wouldn't have minded an entire day there just to sketch architectural elements. The hallways were filled with magnificent marble arches and a central winding marble stairway. This courtroom had exquisite woods with intricate carvings, which of course I didn't have time to render.


The proceedings got underway, and I got to experience at least a little bit of what courtroom artists are up against when they are trying to capture a scene amidst a cast of changing players. I have to say, it was really a lot of fun to do this, though I'm not sure I'd want to do it under the kinds of pressures that the courtroom artists endure. There are lots of things I'd plan differently the next time around, such as leaving spaces to put in figures that would move into various positions in the room, then pop them into those spots as the situations present themselves.

This second sketch was done over a blue wash, which was a little bit dark in terms of being able to present my light values. That's something I'll have to take into consideration next time, especially if I plan to use watercolor over it. I resorted to a little white gouache to reclaim some lights, like on the table tops. It also would have been nicer to work a larger size for this; however, I was trying to remain inconspicuous, so the double spread of a 5.5x8.5" book was perfect for a few minutes of stealth sketching.


Watercolor Cards


I've had an urge to do some small watercolor sketches of animals from photos I took at the zoo over the last couple of years, so I'm doing them on watercolor paper as cards. I tear the paper from full sheets, fold it into cards, and tape around the edges to a board to do the painting. If you do this, be sure when you go to paint that you know which way the fold is facing underneath the tape. (You can guess why I'm reminding you of this! ) I'm using just three colors for these in an effort to keep it simple and harmonious.

I have a new little model here at home. My sister's tiny miniature Dachshund, BB, has come to live with us.  Although Rondo is a small dog, you can see that BB is only about 1/3 his size and weight. She's settling in very well with the rest of the menagerie. She is very affectionate and has some separation anxiety, which isn't surprising considering that she went everywhere with my sister inside a shoulder bag!. She has a little toy that we call her "baby", and she carries it with her all the time. She is totally disinterested in any other toys, and just wants that one. Sometimes she hides it, forgets where she put it, and frantically looks around for it. We all have to drop what we're doing and help her rescue the baby. BB is adorable and we all love her to bits.


Friday

Reaching for the Tulips


This has been a long couple of months away from my art. My husband's uncle passed away, my daughter was in the hospital, and my younger sister died suddenly.  I dropped everything, and spent my time helping to pick up the pieces and reassemble our lives as best we could. My sister's funeral has not yet been held, but I'm at a point where I can start to pick up a brush again from time to time. I've also done some sketches over the past couple of months that I'll be posting as I get computer time.

My sister Liz loved cats. This Royal Doulton sculpture was one that I inherited from her. I set it up in a still life with some tulips given to me by my friend Patricia, and some luscious pears. The painting is mostly watercolor, with some gouache, metallic Gelly Roll pen, and dark gray brush pen. It was done in card format on a folded piece of Stillman & Birn Zeta paper --- a fabulous 180 pound paper with a smooth surface.

Many thanks to all my friends and viewers who have sent your condolences, thoughts, and good wishes our way. You are all very much appreciated.

Thursday

The Golden Video Library

Today, I'm not bringing you a sketch. Instead, I'd like to direct your attention to the Golden Video Library. I'm always surprised by how few artists know about this fabulous resource that the Golden Paint Company has created. I am often asked by friends and blog visitors how to apply an isolation coat or varnish, or what the best way is to prepare painting surfaces, or characteristics of specific mediums. These videos explain and demonstrate these things and more, far better than I can! Do yourself a favor and take some time to explore the video offerings they've posted on their website. It may give you ideas for new things to try, ways to use materials you may already have, or better ways to achieve your painting goals. Golden also has a YouTube channel, but I like going to the library on their website because all the videos show on the page together. Enjoy!

Friday

RiverWinds Gallery Sketch with Pitt Pens and Watercolor

(click sketch to enlarge)
Sketched at RiverWinds Gallery in Beacon NY
Pitt Big Brush Pens (cool greys) and watercolor
on Stillman & Birn Zeta paper

This sketch was done while at RiverWinds Gallery last weekend. They have such beautifully arranged displays, and the gallery is an inviting place to spend the afternoon. Many thanks to gallery owner Virginia Donovan for a wonderful day.

I started out this sketch with just the monochrome Pitt Cool Grey Big Brush Pens. Gallery visitors thought I should leave it as the monochrome version, but the color junkie in me won out and I added color to it. Then they all liked the color version better! You can see the monochrome version by clicking here. Which do you prefer?

The paper is the new 180 lb. smooth Zeta paper from Stillman and Birn. I love the way pens and markers glide over the surface! We should be able to get sketchbooks of it in another month or so. Can't wait!

Tuesday

Best of the Year Part III --- My Favorite Discoveries

You may think I've played with just about every art product on the market at one time or another, but every year I seem to discover or rediscover something that plays an big role in my work for the year. This past year, that happened with several products that had been on the market for quite some time, but suddenly I was hooked! So here are my favorite new "older" products of the past year.

GOLDEN AIRBRUSH PAINTS
First up are Golden Airbrush Paints, used with regular brushes rather than an airbrush.

 I did not exactly "stumble" upon these. In spite of the fact that I consider myself to be a rather creative person, I never would have thought to give these a try! I was struggling with some effects I was trying to create with the fluid acrylics. I wanted something that would lift more easily and maintain a transparent glow like watercolors, stay put when dry like acrylics, and be able to frame without mats and glass like oil paintings. I wanted to be able to lift color to reclaim my lights, and blend better (like wet watercolor), but retain the capability of opacity like acrylics. In discussing this issue with a tech staff member at the Golden Paints factory one day, he said, "Oh, you want to try the Airbrush paints!" He pulled some out along with some brushes, and we played. They lifted. They glowed. They blended. They were permanent when dry. They are certainly misnamed as "Airbrush" paints, since no airbrush is needed! He explained that these paints have retarder built in, so they are movable for a longer period of time than the diluted fluids.

We tried using Silverpoint Ground as white to reclaim whites too, which worked better and also dissolved not-quite-dry paint a bit for easier blending. Apparently the Silverpoint Ground has the highest concentration of Titanium White pigment. I started carrying a small ink vial filled with it. (Note that if you do that, the vial will not contain the little metal ball that helps mix the pigment, so you'll have to stir well with a wooden brush end or palette knife if it settles.)

I fell head over heels in love with the Airbrush paints. I bought all of the most lightfast, single pigments that were available. I took them up to Kaaterskill Falls, and the Helderberg Escarpment. I was able to formulate a small, lightweight painting kit with them that fit easily in my backpack, and it became one of my favorite sketching mediums of the year. I'm looking forward to doing a lot more with them both in the studio and outdoors. I also want to try them as an underpainting for pastels, and for transparent glazes and opaque overpainting techniques on monochrome underpaintings. I want to try them in combination with Pitt Brush Pens and fountain pens, and on large sheets of rag watercolor paper, as well as boards. So much to explore. So exciting!


FABER CASTELL PITT BRUSH PENS
Another discovery, which I started using in 2011 but more widely used in 2012, are the wonderful Pitt Brush Pens. Here's some of my stash of the Regular and Big versions. They also make great chisel-pointed calligraphy pens, but those don't come in many colors. (I hope they expand that color range over time.) 

Things I love about these are:
  • Most of the colors are highly lightfast. Those ratings are clearly marked on the pens, so you can select only extremely permanent, archival colors for fine art use.
  • Once they're dry, they don't budge.
  • While wet, you can blend the pigment with another marker, a finger, dampened tortillion or Qtip, etc.
  • There is a large selection of colors.
  • The big brush pens have a ton of ink in them. No need to worry about running out while working.
  • Since they are water based, there is no odor.
  • They don't have a tendency to bleed through paper.
  • They can cover a large area in a much shorter amount of time than colored pencils or fine-tipped markers, yet still have a point for detailing. 
  • Convenient to carry. No palette needed. No water, paints, or spills!

Here are some of the sketches I've done with them --- just a small sampling:
Quick Figure Sketching
Tree Sketch
At the Zoo
More at the Zoo
In the Greenhouse
Greenhouse Statue

Here is one I just did on Sunday with Pitt Big Brush Pens, using only the Cool Greys. I added watercolor afterwards, and will post the version with the watercolor added soon.


Things I don't like about them include:
  • Older Pitt Brush Pens don't have the color name on the barrel of the pen. That's a real PITA when you want to reorder a color, or even identify one! The writing on the barrel is so tiny that identification by number is impossible without my glasses, and then I need a chart to find the color name from the number. This is a packaging nightmare.
  • That isn't the only packaging nightmare either. The barrels of the pens don't effectively match the colors and values of the inks inside. This is most problematic on the sets of warm and cool greys, where lighter valued barrels contain darker valued ink and vice versa. It is further complicated if you happen to have the pens without color names on the barrels, so you can't even tell by reading the name which is lighter or darker. 
  • Even if you can read which is lighter/darker, two of my Big Brush Cold Greys are actually reversed. From lightest to darkest, they go I, IV, III, VI, Black. Values III and IV are almost exactly the same, but reversed. Value I is very light as you'd expect, but the next pen available is quite dark. There is nothing in between for light-colored objects in a sketch. I think what I'll have to do is combine the warm and cool greys and see if I can get a better value scale happening, even if the colors will vary. I hope Faber Castell resolves these issues in the future.

Even with those negatives, these are my favorite journaling markers for both headlines on text, borders, and sketching. I haven't found anything else that even comes close. Tombow markers and Sharpies are not archival. Copic markers bleed through everything and they smell. Many other water based markers on the market are not waterproof. Since Pitt Pens are archival, sketch work can directly translate to fine art and hang on a wall. They won't run if you layer watercolor over the top. I love the way they glide on the smooth Epsilon sketchbook paper by Stillman and Birn, and also the new extra heavy weight Zeta paper. (Zeta books should be available in another month or so.) If you want to check out somebody who uses them to great effect, take a look at Don Colley's blog!

GOLDEN IRIDESCENT AND INTERFERENCE ACRYLICS


What woman doesn't like a little glittery glam from time to time? I've had a great time exploring the virtues of the Golden Iridescent and Interference acrylics in the last couple of years. I've used them in my sketchbooks, mixed in with other colors in acrylic paintings, and to make beautiful backgrounds and borders with sponges, sprayers, stencils, and brushes. Give them a try and bring some sparkle into your life!

If you'd like to see Part II of this "Best of the Year" series, click here.


Sunday

Best of the Year Part II --- Products New on the Market

I've tried a lot of new products this year. Some I loved, some I hated, and some were okay but probably won't become staples in my studio. A few I know I'll be using for many years to come. These are my favorite items new to the art market this past year. You can click the images to see larger, clearer photos.

Stillman & Birn Beta Hardbound Sketchbooks (two sizes)
Stillman & Birn new Zeta paper (soon to be available in books)

I have adored the new, extra heavyweight sketchbooks that Stillman and Birn manufactured. The 180 lb. paper takes everything I've thrown at it. These sketchbooks go everywhere with me and I can have confidence that no matter what medium I decide to use in my travels, it will work on this surface! It's such a joy to be able to work across the spread  (since the books open completely flat) and on both side of the page with no show-through or buckling. I can travel with a book half the size, and in using the full spread, I have double the space. They're amazing.

Stillman & Birn has also made a new paper called Zeta. It should be available in hardbound and wirebound books very soon. I've been able to test drive some loose sheets of the new paper, and I am chomping at the bit to get my paws on a book of it! Since I love fountain pens, the very smooth, plate-like surface of Zeta is perfect for my pen and ink work. Nothing shows through this 180 lb. paper to the other side, and the heavy weight and abundant sizing enable it to handle wet media too.

Speaking of pen and ink, here is another favorite product: the long-anticipated TWSBI Mini fountain pen:

I've always loved my larger TWSBI, but it's a bit heavy in my hand. I got a fine point TWSBI Mini when they came out a month or two ago, and it's the smoothest fine point I've ever written with. If you have a large hand, you may find the Mini a bit small, even when the cap is posted on the barrel of the pen. But for me, it's absolutely perfect. I couldn't be happier. It goes everywhere with me. I find it comfortable in my hand, it writes like a dream, and holds a ton of ink. It is currently loaded with Private Reserve Copper Burst.

I hope you'll give some of these new products a try. Many new items hit the art supply market every year, and it's hard to get around to sampling everything, but I do feel the new Stillman & Birn products and the TWSBI Mini are worthy of rave reviews from among the large number of new materials I sampled during the year.

In the past year or so, I've also been working with a lot of products that are not new to the market, but are new to me. Some of them have become favorite painting, drawing and sketching materials. I'll be featuring those in the last installment of my "Best of the Year" series, so stay tuned.

You can see "Best of the Year Part I" on this link.

Wednesday

Best of the Year, Part I


Happy 2013 to all my viewers! I'd like to start off the new year by sharing my favorite discoveries and new products of the past year. Some are new to the market, while others are things I'd just not explored before and hope to work with more in the year to come. I hope that some of you will enjoy using them too.

Today's post is about my favorite pigment of 2012: PR206. It is actually a Quinacridone red, but looks more earthy than many of the Quins. This pigment gives me a warm red, transparent earth color. It can easily be mixed with earthy yellows to yield the equivalent of a transparent red oxide. When mixed with ultramarine blue, it creates a dark, muted violet. I started using this color in my watercolor palette after taking a class with David Taylor. It became such a staple in my palette that I searched for the same pigment in oils and acrylics. The past few years have found me working transparently a lot more in both oils and acrylics, so this pigment was a natural fit --- especially for underpainting and glazing. I did several paintings using it as my only red. The pigment goes by many different names, so you need to look carefully for the pigment number, which is PR206.

Here are a few manufacturers that make it for different mediums.

Watercolor
Daniel Smith --- Quinacridone Burnt Scarlet
Winsor Newton --- Brown Madder

Oils
Maimeri Puro --- Avignon Orange
Daniel Smith --- Quinacridone Burnt Scarlet

Acrylics
Golden Fluid --- Quinacridone Burnt Orange
Golden Heavy Body --- Quinacridone Burnt Orange
Golden OPEN --- Quinacridone Burnt Orange


Click here to see Best of the Year, Part II.